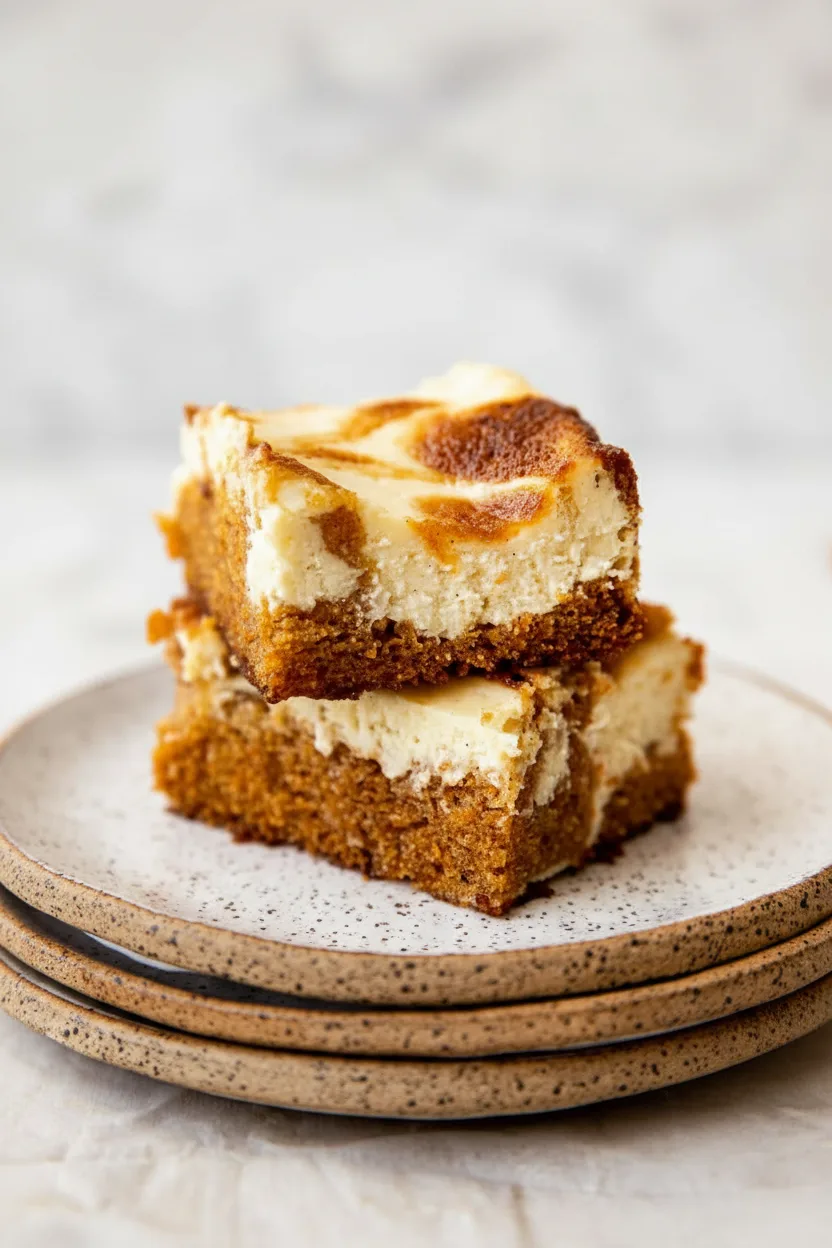
Craving a decadent dessert that fuels your fitness goals? Look no further than this ultimate protein cheesecake recipe. This isn’t your average, sugar-laden treat. By cleverly incorporating high-quality protein sources like Greek yogurt and protein powder, this cheesecake delivers a creamy, satisfying experience that packs a nutritional punch.
It’s the perfect solution for anyone seeking a delicious, high protein dessert that doesn’t sacrifice flavor for function. Whether you’re following a specific eating plan or simply want a healthier indulgence, this easy baked dessert is about to become your new favorite.
Why This Protein Cheesecake is a Game-Changer
Traditional cheesecake, while delicious, is often a calorie-dense dessert with significant amounts of sugar and saturated fat. This recipe completely reimagines the classic, transforming it into a supportive part of a healthy lifestyle. The star ingredient, Greek yogurt, adds a tangy creaminess while significantly boosting the protein content and reducing overall fat.
Combined with a carefully selected protein powder and a nutrient-dense almond flour crust, every slice becomes a balanced, creamy healthy treat.
The result is a dessert that helps with muscle recovery, keeps you feeling full longer, and satisfies your sweet tooth without derailing your progress. It’s proof that a fitness dessert recipe can be both incredibly delicious and aligned with your wellness goals.
For more inspiration on incorporating protein into your meals, explore our collection of 16 high-protein recipes for a healthy boost.
Key Ingredients for Success
The magic of this low calorie cheesecake lies in its smart ingredient swaps. Each component is chosen for its nutritional profile and functional role in creating the perfect texture and taste.
Powerhouse Protein Sources
Cream Cheese & Greek Yogurt: The base of any great cheesecake. Using full-fat cream cheese softened to room temperature ensures a rich, smooth texture. The Greek yogurt is the true hero, providing a protein-packed, tangy contrast that lightens the overall fat content. If you don’t have Greek yogurt, well-drained and blended cottage cheese is an excellent substitute.
Protein Powder: Opt for a high-quality unflavored or vanilla protein powder. This not only amps up the protein content but also helps stabilize the filling without adding excess bulk or a chalky texture. It’s a cornerstone of any effective fitness dessert recipe.
The Supporting Cast
Almond Flour & Butter: These form the simple, gluten-free crust. Almond flour offers a nutty flavor, a dose of healthy fats, and fiber, making it far superior to traditional graham cracker crumbs. The melted butter binds it all together for a crumbly, delicious base.
Keto Sweetener & Flavor Agents: A keto-friendly sweetener keeps the sugar content remarkably low at just 4 grams per serving. Pure vanilla extract (or a scraped vanilla bean for ultimate luxury) and a splash of optional lemon juice brighten the flavor profile, cutting through the richness perfectly.
This careful balance is what makes it such a standout high protein dessert.
Step-by-Step Baking Guide
Creating this masterpiece is surprisingly straightforward. The key is patience and attention to detail during the baking and cooling phases.
1. Prepare the Crust (Optional)
Start by preheating your oven to 300°F (150°C). Combine 1 1/2 cups of almond flour with 4 tablespoons of melted, plant-based butter alternative in a bowl. Mix by hand or pulse in a food processor until it resembles wet sand. Press this mixture firmly into the bottom (and slightly up the sides, if desired) of an 8- or 9-inch springform pan lined with parchment paper.
Pre-bake this crust for about 10 minutes until it’s lightly golden and fragrant. Let it cool completely before adding the filling. This step ensures a crisp base that won’t become soggy.
2. Make the Luxurious Filling
For the silkiest texture, use a food processor or high-powered blender. Add 16 ounces of softened cream cheese, 1 1/2 cups of Greek yogurt, 3 scoops of protein powder, 3 large eggs, 1/3 cup of keto sweetener, 1 tablespoon of vanilla extract, and 1 tablespoon of lemon juice (if using). Blend the ingredients just until they are smoothly combined and uniform. Critical Tip: Avoid over-mixing! Excessive blending incorporates too many air bubbles, which can lead to cracking during baking.
If mixing by hand, ensure your cream cheese is very soft. Whisk it first with the yogurt, protein powder, and sweetener until smooth, then incorporate the eggs one at a time, followed by the vanilla and lemon juice.
3. The Perfect Bake & Chill
Pour the creamy batter into your prepared, cooled crust. If making a crustless version, simply pour it into a parchment-lined springform pan with greased sides. Bake at 300°F for 45-50 minutes. The cheesecake is done when the edges are set but the center still has a slight, gentle jiggle—like Jell-O. This is crucial for a creamy center. Turn off the oven, crack the door open with a wooden spoon, and let the cheesecake cool slowly inside for 30 minutes.
This gradual temperature change is the best defense against cracking. Finally, refrigerate the cheesecake in the pan for at least 4 hours, but ideally overnight. This sets the structure and intensifies the flavors, making it the ultimate make-ahead, easy baked dessert for any occasion.
Expert Tips & Flavor Variations
Master the basics, then make it your own. Here are some pro tips and ideas to customize your protein cheesecake.
Pro Tips for Perfection
- Room Temperature is Key: Ensure your cream cheese, eggs, and Greek yogurt are all at room temperature before mixing. This prevents a lumpy batter and ensures even baking.
- Prevent Sticking: Thoroughly line your pan with parchment paper and grease the sides well with your plant-based butter alternative for clean, easy removal.
- Patience with Chilling: Do not rush the refrigeration step. A full overnight chill guarantees the perfect sliceable texture.
- Clean Slices: For picture-perfect slices, dip your knife in hot water and wipe it clean between each cut.
Delicious Flavor Variations
The vanilla base is a perfect canvas for creativity. Try folding in 1/2 cup of fresh berries into the batter before baking. For a chocolate lover’s dream, add 1/4 cup of unsweetened cocoa powder to the filling mixture. You can even swirl in a tablespoon of pure peanut butter or almond butter for a nutty twist.
The versatility of this recipe makes it a staple, much like the convenient favorites in our roundup of 14 easy crockpot meals for busy families—both are designed for delicious, hassle-free success.
Serving, Storage & Nutritional Power
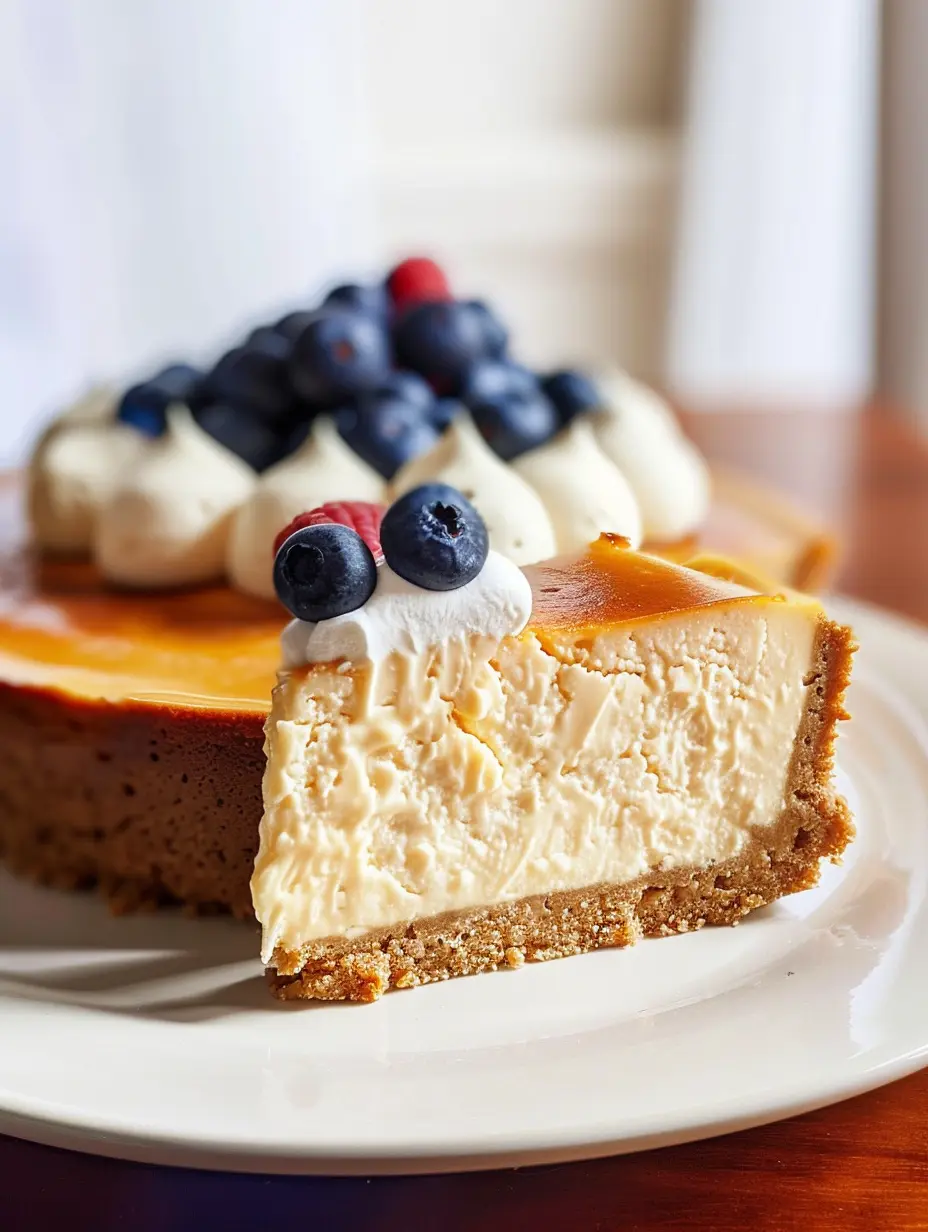
This cheesecake shines in its simplicity. Serve it plain, or elevate it with fresh berries, a dollop of whipped coconut cream, or a drizzle of sugar-free chocolate sauce. It’s an impressive dessert for guests who would never guess it’s a high protein dessert.
Storage Information
Store any leftovers covered tightly in the refrigerator for up to 5 days. The flavors often improve after a day or two. This cheesecake also freezes beautifully for up to 2 months. Wrap individual slices or the whole cheesecake (once fully set) tightly in plastic wrap and then aluminum foil. Thaw overnight in the refrigerator before serving.
Nutritional Breakdown Per Serving
| Nutrient | Amount |
|---|---|
| Calories | 180 kcal |
| Protein | 19 g |
| Total Fat | 9 g |
| Carbohydrates | 7 g |
| Dietary Fiber | 2 g |
| Sugar | 4 g |
This nutritional profile is what makes this recipe a true winner. With 19 grams of protein and only 7 grams of net carbohydrates per generous serving, it’s a satisfying, macro-friendly choice that supports an active lifestyle. It perfectly complements a balanced diet, just as a flavorful, well-rounded meal does.
For another fantastic idea that combines ease and taste, check out these 16 delicious and easy taco potato recipes.
Conclusion: Your New Go-To Dessert
This protein cheesecake recipe successfully bridges the gap between indulgence and nutrition. It proves that you don’t have to give up the foods you love to meet your health and fitness goals. With its creamy texture, rich flavor, and impressive protein content, it stands as the ultimate creamy healthy treat.
Whether you’re meal prepping for the week, needing a post-workout refuel, or hosting a dinner party, this easy baked dessert is guaranteed to impress. Give it a try and discover how delicious healthy eating can truly be.
Recipe
Print
Cheesecake (With Greek Yogurt)
- Total Time: 55 min
- Yield: 12 servings 1x
Description
A creamy, decadent cheesecake reinvented as a high-protein, low-sugar dessert. This easy recipe uses Greek yogurt and protein powder for a satisfying treat that supports your fitness goals.
Ingredients
16 ounces cream cheese (softened to room temperature)
1 1/2 cup Greek yogurt (or drained and blended cottage cheese)
3 scoops protein powder (unflavored or vanilla)
3 large eggs
1/3 cup keto sweetener
1 tablespoon vanilla extract (or scraped half vanilla bean)
1 tablespoon lemon juice (optional)
1 1/2 cup almond flour
4 tablespoons plant-based butter alternative (melted)
Instructions
- Pre-heat the oven to 300 °F (150 °C).
- Optional crust: Combine almond flour and melted plant-based butter alternative. Press into a parchment-lined 8- or 9-inch springform pan. Bake for 10 minutes until golden. Cool completely.
- Filling: In a food processor, blend cream cheese, Greek yogurt, protein powder, eggs, keto sweetener, vanilla, and lemon juice until just smooth. Do not overmix.
- Pour filling into the cooled crust (or into a parchment-lined, greased pan for crustless).
- Bake at 300 °F for 45-50 minutes, until edges are set but center has a slight jiggle.
- Turn off oven, crack the door, and let cheesecake cool inside for 30 minutes.
- Refrigerate in the pan for at least 4 hours, preferably overnight, before slicing and serving.
Notes
- Ensure all dairy ingredients are at room temperature for a smooth batter.
- Over-mixing the filling can incorporate air bubbles and cause cracking.
- The cheesecake must chill thoroughly to set properly for clean slices.
- Store leftovers covered in the refrigerator for up to 5 days.
- Prep Time: 10 min
- Cook Time: 50 min
- Category: Main Course
- Method: Baked
- Cuisine: American
Nutrition
- Calories: 180 kcal
- Sugar: 4 g
- Fat: 9 g
- Carbohydrates: 7 g
- Fiber: 2 g
- Protein: 19 g