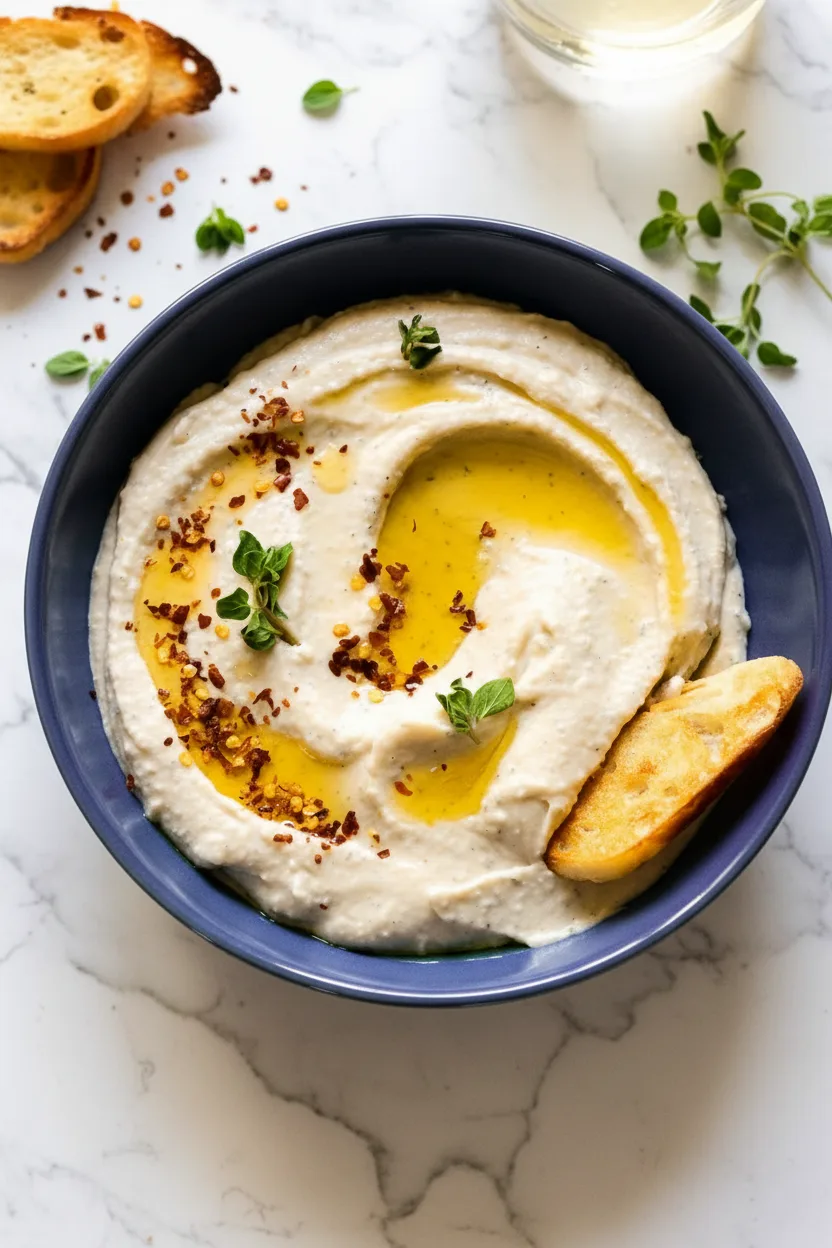
This creamy Roasted Garlic White Bean Crostini Dip is the perfect combination of savory elegance and rustic simplicity.
Silky smooth and packed with flavor, it transforms humble pantry staples into a dish that feels truly special. The mellow sweetness of roasted garlic pairs beautifully with mild white beans, while a hint of lemon and fresh sage adds a bright, aromatic lift.
Furthermore, it’s incredibly versatile, making it the ideal choice for everything from an elegant appetizer platter to a casual weeknight snack. This dip is a guaranteed crowd-pleaser that comes together with minimal effort for maximum reward. You will find yourself making it again and again for any occasion.
Why You’ll Love This Roasted Garlic White Bean Dip
You will adore this dip for countless reasons. First, it delivers a luxurious, creamy texture without any heavy ingredients, relying instead on the natural magic of blended beans. Meanwhile, the process of roasting garlic creates an incredible depth of flavor that is both sweet and savory.
Additionally, this recipe is naturally satisfying and protein-rich, offering a fantastic plant-based option for your table. It is also incredibly easy to prepare, with most of the hands-off time spent roasting the garlic. Consequently, you can easily multitask and prepare other parts of your meal. Finally, its elegance belies its simplicity, making you look like a gourmet chef with very little work.
Recipe
Print
Roasted Garlic White Bean Crostini Dip
- Total Time: 45 min
- Yield: 6 servings 1x
- Diet: Vegetarian
Description
A creamy, savory dip made with sweet roasted garlic, white beans, and fresh sage. Perfect for easy entertaining or a tasty snack.
Ingredients
- 1 head garlic
- 1 15 oz can Great Northern or cannellini beans, drained and rinsed (425 g)
- 2 oz cream cheese, softened (56 g)
- 2 tbsp lemon juice (30 ml)
- 1 tbsp fresh sage, chopped (3 g)
- 2 tbsp extra virgin olive oil (30 ml), divided
- Salt and pepper, to taste
- Red pepper flakes, for garnish (optional)
- Crackers, crostini, and/or veggies, to serve
Instructions
- Preheat oven to 400 degrees F (200 C).
- Slice 1/4 inch from the top of the garlic bulb to expose the cloves. Peel away excess loose skin.
- Drizzle garlic with 1 tsp olive oil and sprinkle with salt and pepper. Wrap completely in foil and place on a small baking sheet.
- Roast for 30 minutes, or until cloves are soft and golden. Let cool.
- Discard the foil. Squeeze the roasted garlic cloves out of their skins.
- In a food processor, combine the drained beans, roasted garlic, cream cheese, lemon juice, sage, and a big pinch of salt and pepper.
- With the processor running, slowly stream in the remaining olive oil. Blend until very smooth and creamy, about 1-2 minutes.
- Taste and adjust seasoning with more salt and pepper as needed.
- Transfer dip to a bowl. Drizzle with a little extra olive oil and sprinkle with red pepper flakes if using. Serve with your choice of dippers.
Notes
- For a dairy-free version, use a plain vegan cream cheese alternative.
- Dip can be made up to 2 days ahead. Store covered in the refrigerator.
- If dip is too thick, blend in a teaspoon of water or broth at a time to reach desired consistency.
- Fresh thyme or rosemary can be substituted for the sage.
- Prep Time: 15 min
- Cook Time: 30 min
- Category: Main Course
- Method: Baked
- Cuisine: American
Nutrition
- Serving Size: 1/6 of recipe
- Calories: 145
- Sugar: 1g
- Sodium: 180mg
- Fat: 8g
- Saturated Fat: 2.5g
- Unsaturated Fat: 5g
- Trans Fat: 0g
- Carbohydrates: 14g
- Fiber: 3g
- Protein: 5g
- Cholesterol: 10mg
Ingredients and Substitutions
This recipe uses a short list of fresh, flavorful ingredients. Fortunately, most are pantry staples or easy to find.
Base Components
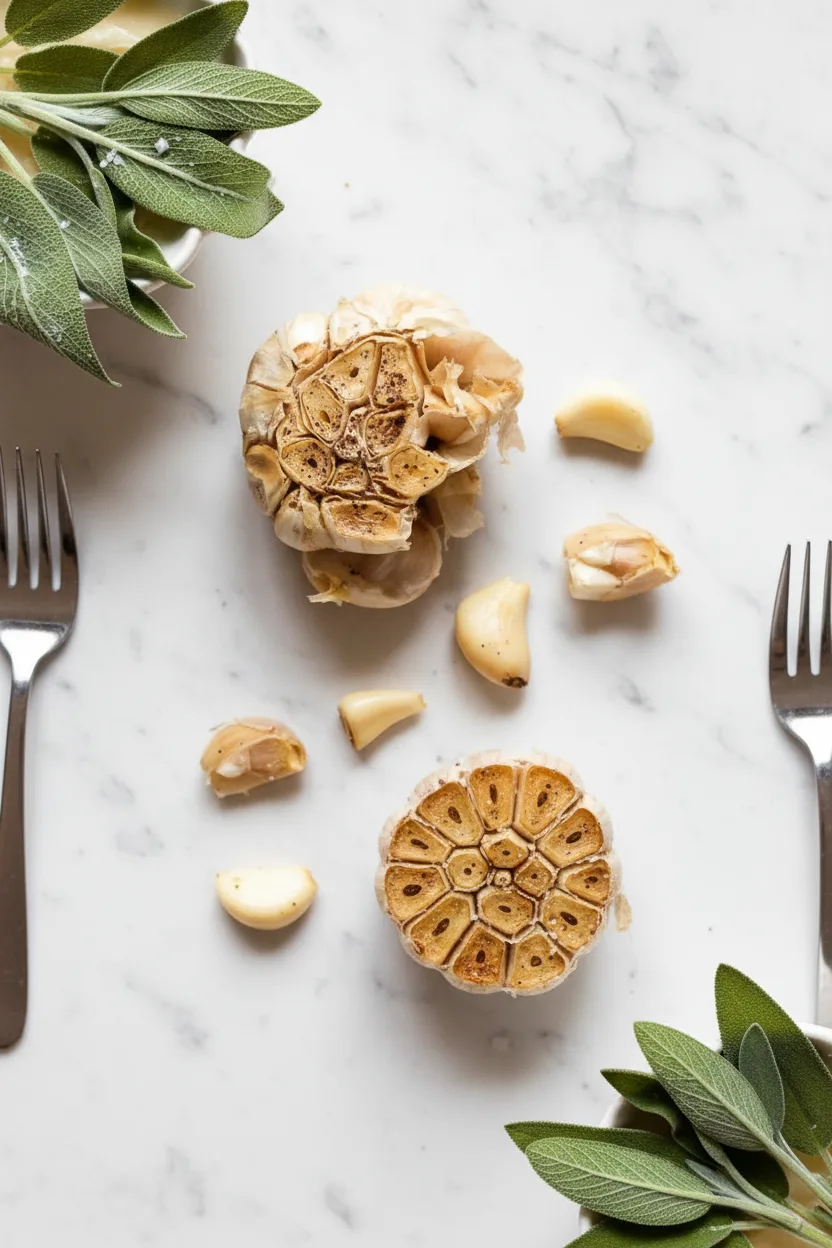
- Garlic: One whole head of garlic is the star. Roasting transforms its sharp bite into a sweet, caramelized paste.
- White Beans: A 15-ounce can of Great Northern or cannellini beans forms the creamy base. Always drain and rinse them well to remove the starchy canning liquid.
- Cream Cheese: Two ounces of softened cream cheese adds richness and helps create an ultra-smooth, spreadable consistency. For a dairy-free version, you could use a plain, unsweetened vegan cream cheese alternative.
Sauce and Seasonings
- Lemon Juice: Two tablespoons of fresh lemon juice are essential for cutting through the richness and adding a necessary zesty note.
- Fresh Sage: One tablespoon of chopped fresh sage provides an earthy, aromatic flavor that complements the garlic beautifully. If you don’t have sage, fresh thyme or rosemary are excellent substitutes.
- Olive Oil: Use a good quality extra virgin olive oil for both roasting the garlic and blending into the dip. It adds fruity notes and richness.
- Salt & Pepper: These seasonings are crucial for balancing all the flavors. Always season to taste.
- For Serving: Red pepper flakes add a optional spicy garnish. Serve with crostini, sturdy crackers, or a variety of fresh vegetables like carrot sticks, cucumber slices, and bell pepper strips.
How to Make Roasted Garlic White Bean Dip
This process is straightforward. Therefore, follow these simple steps for a perfect result every time.
Step 1: Roast the Garlic
First, preheat your oven to 400 degrees Fahrenheit. Next, take a whole head of garlic and slice about 1/4 inch off the top to expose the cloves inside. Peel away any loose, papery outer skin, but leave the bulb intact. Place the garlic on a small piece of foil, drizzle it with about one teaspoon of olive oil, and sprinkle with a pinch of salt and pepper.
Then, wrap the garlic completely in the foil, creating a little packet. Place this on a small baking sheet and roast for about 30 minutes. Ultimately, the garlic is ready when the cloves are deeply golden, soft, and fragrant. Let it cool until you can handle it comfortably.
Step 2: Prepare the Dip Base
Once the garlic is cool, discard the foil. Gently squeeze the base of the bulb to push the soft, caramelized cloves out of their skins. Sometimes a stubborn clove needs a little peel. Meanwhile, drain and rinse your can of white beans thoroughly.
Step 3: Blend Until Smooth
Now, combine the roasted garlic cloves, rinsed white beans, softened cream cheese, fresh lemon juice, and chopped sage in the bowl of a food processor. Add a generous pinch of salt and pepper. Secure the lid and begin to process. While the machine is running, slowly stream in the remaining tablespoon of olive oil through the feed tube.
Continue to blend for a full minute or two, scraping down the sides as needed, until the mixture is completely smooth, creamy, and velvety. Taste the dip and adjust the seasoning with more salt, pepper, or a squeeze of lemon juice if desired.
Step 4: Serve and Enjoy
Transfer your beautifully smooth dip to a serving bowl. For a final touch, drizzle a little extra olive oil over the top and sprinkle with red pepper flakes if you like a bit of heat. Serve immediately with your chosen dippers, or cover and chill until ready to serve. The flavors continue to meld and develop as it sits, making it even more delicious.
Pro Tips for Success
Follow these expert tips to ensure your dip turns out perfectly every single time.
- Roast Until Deeply Golden: Do not under-roast the garlic. The cloves should be completely soft and a rich golden-brown color. This deep roasting is what creates the sweet, mellow flavor that defines the dip.
- Rinse the Beans Well: This step is non-negotiable. Rinsing the beans removes the thick, starchy liquid from the can, which can make your dip taste bland and give it an unpleasant texture. Consequently, you get a cleaner, brighter bean flavor.
- Blend Thoroughly: Patience is key when blending. Let the food processor run for a full two minutes to achieve the creamiest, silkiest texture possible. A high-powered blender also works wonders here.
- Season in Layers: Season the garlic before roasting, then season the bean mixture before blending. Finally, always do a final taste and adjust after blending. This layered seasoning builds a more complex and balanced flavor profile.
- Serve at the Right Temperature: This dip is delicious served slightly warm, at room temperature, or chilled. For the best flavor experience, let it sit out for 15-20 minutes before serving if it has been in the refrigerator.
Flavor Variations
This recipe serves as a fantastic canvas for creativity. Feel free to experiment with these simple twists.
- Herb Garden Dip: Swap the sage for a combination of fresh basil, parsley, and chives for a brighter, more summery flavor.
- Sun-Dried Tomato & Rosemary: Add 1/4 cup of chopped, oil-packed sun-dried tomatoes and a teaspoon of fresh rosemary to the food processor for a Mediterranean twist.
- Spicy Harissa Dip: Blend in one to two teaspoons of harissa paste for a smoky, North African-inspired kick.
- Citrus Zest Boost: Add the zest of the lemon along with its juice for an even more pronounced citrus aroma.
Serving Suggestions
This versatile dip shines in many roles beyond the appetizer bowl. For instance, it makes an outstanding spread for sandwiches and wraps, especially with grilled vegetables.
Alternatively, you can use it as a sophisticated topping for baked potatoes or a flavorful base for a grain bowl. It also pairs wonderfully with a simple lemon ricotta summer pasta for a light and complete meal.
For a full party spread, consider offering it alongside other seasonal favorites like bright spring cupcakes for dessert. Ultimately, its creamy texture and savory flavor make it a welcome addition to any table setting.
Storage and Freezing Instructions
Proper storage keeps this dip fresh and delicious for days. First, transfer any leftovers to an airtight container. Then, store it in the refrigerator for up to 4 days. The flavors will continue to meld, often tasting even better the next day.
Before serving again, give it a good stir and let it sit at room temperature for 15 minutes to soften. If you wish to freeze it, place the dip in a freezer-safe container, leaving about half an inch of space at the top for expansion. It will keep well for up to 2 months.
To use, thaw overnight in the refrigerator. The texture may separate slightly after freezing; simply give it a vigorous stir or a quick pulse in the food processor to bring it back together. For best results, consume it within a week after thawing.
Nutrition Facts per Serving
| Calories | Fat | Carbs | Protein | Fiber | Sugar | Sodium |
|---|---|---|---|---|---|---|
| 145 | 8g | 14g | 5g | 3g | 1g | 180mg |
FAQs About White Bean Dip
Can I use dried beans instead of canned?
Absolutely. You can use about 1.5 cups of cooked white beans. Simply soak and cook dried cannellini or Great Northern beans according to package directions until very tender, then use them in place of the canned beans.
My dip seems too thick. How can I thin it out?
If your dip is thicker than you prefer, simply blend in a small amount of water, vegetable broth, or additional olive oil, one teaspoon at a time, until it reaches your desired consistency.
Can I make this dip without a food processor?
Yes, but it requires more effort. You can mash the beans and roasted garlic with a potato masher or fork until as smooth as possible, then whisk in the remaining ingredients vigorously. However, the texture will be more rustic and less uniformly creamy than with a machine.
What are the best dippers for this recipe?
This dip pairs wonderfully with toasted baguette slices (crostini), sturdy crackers like water crackers or seeded crisps, and a wide array of fresh vegetables. For a heartier option, try it with pita chips or roasted potato wedges.
How far in advance can I make this?
You can make this dip up to two days in advance. In fact, making it ahead allows the flavors to deepen and meld beautifully. Store it covered in the refrigerator and give it a stir before serving.
Final Thoughts
In conclusion, this Roasted Garlic White Bean Crostini Dip is a testament to how simple ingredients can create something truly extraordinary. Its creamy texture, complex savory-sweet flavor, and effortless preparation make it a recipe you will return to time and again.
Whether you are hosting a fancy dinner party, needing a quick snack, or looking for a flavorful plant-based spread, this dip delivers on all fronts. It’s the kind of reliable, impressive recipe that becomes a staple in your culinary repertoire.
So, gather your ingredients, roast that garlic, and get ready to blend up a bowl of creamy perfection that will have everyone asking for the recipe. For more inspiring meal ideas, explore our collection of fresh summer pasta recipes to complete your menu planning.