Crispy on the outside, tender on the inside, and perfectly seasoned, these baked chicken tenders will become your family’s new favorite meal. Unlike greasy fried versions, this oven-baked recipe delivers the crunch kids love without the mess or extra fat. What’s more, it’s simple enough for busy weeknights yet impressive enough for weekend gatherings.
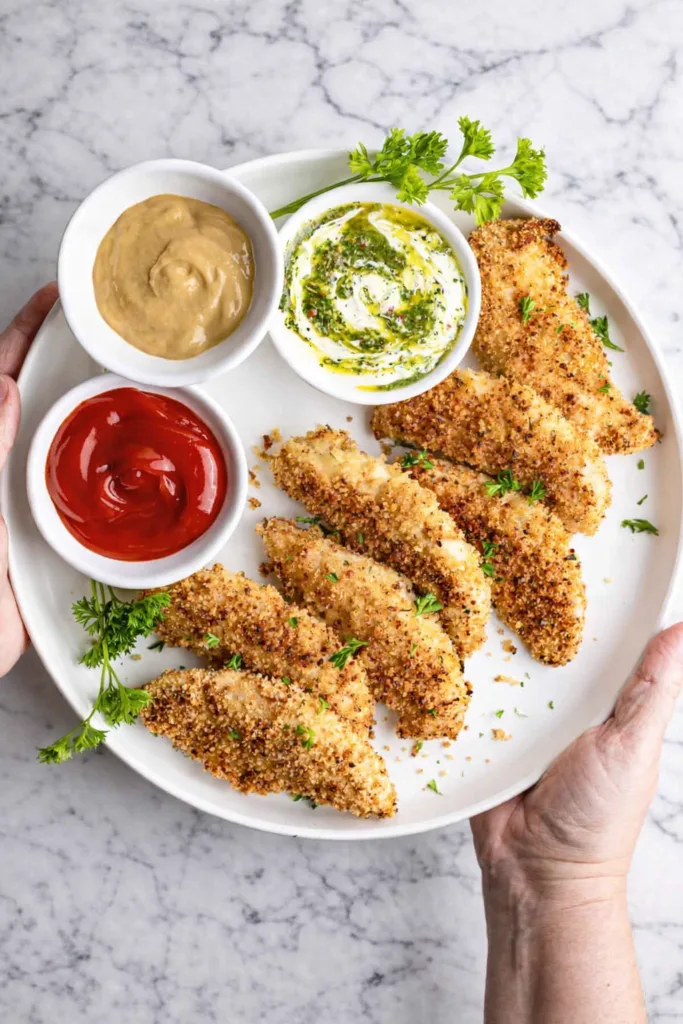
These golden strips get their satisfying texture from a clever combination of panko breadcrumbs and savory seasonings. While many chicken tender recipes call for eggs, this version uses olive oil for dredging – making it allergy-friendly and equally delicious. Plus, with straightforward techniques anyone can master, you’ll have dinner ready faster than you can say “seconds please!”
Why You’ll Love This Chicken Tenders Recipe
Finding meals that satisfy picky eaters while meeting parental standards proves challenging. These baked chicken tenders solve that problem beautifully. First, they skip deep frying while maintaining a crispy exterior kids adore through smart baking techniques. Second, they use simple pantry spices to add flavor without overwhelming young palates.
Another advantage comes from their versatility. Need dinner fast? You’ll have these on the table in 35 minutes flat. Want to sneak in extra nutrition? Try some of our custom variations below. Plus, leftovers keep beautifully for tomorrow’s lunchboxes – assuming any survive the dinner rush!
Recipe
Print
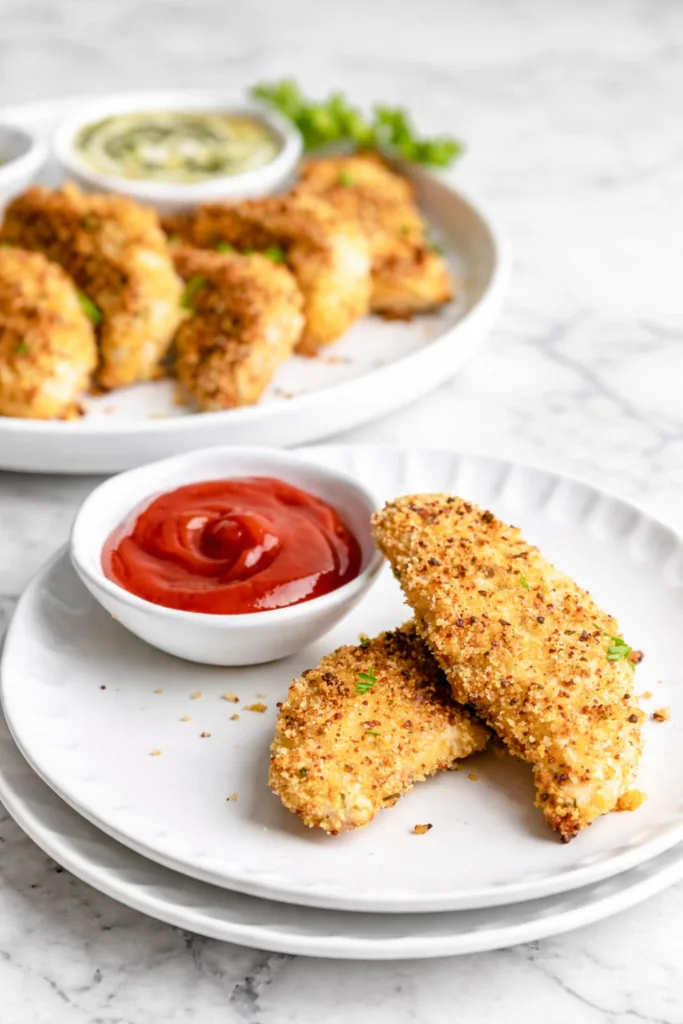
Kid-Friendly Baked Chicken Tenders
- Total Time: 35 min
- Yield: 4 servings 1x
Description
Crispy baked chicken tenders with perfectly seasoned panko crust – a kid-friendly favorite that’s healthier than fried versions. Quick, easy weeknight dinner solution.
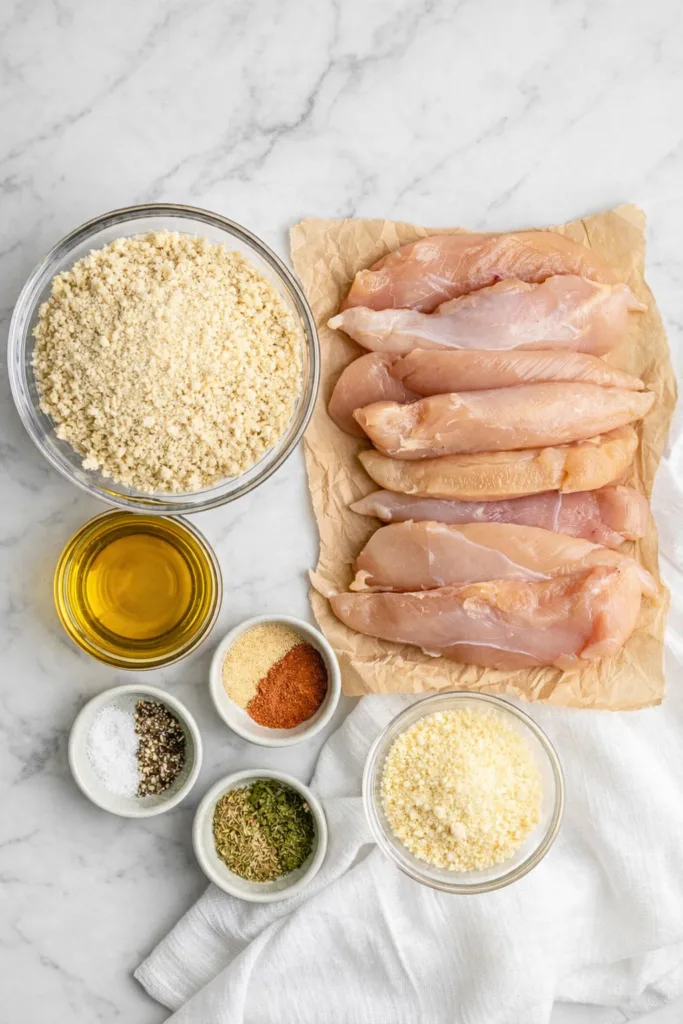
Ingredients
- 1 1/3 cup panko breadcrumbs (80 g) (or regular breadcrumbs)
- 1/4 cup grated mozzarella cheese (25 g)
- 1/2 teaspoon garlic powder
- 1/4 teaspoon thyme
- 1/4 teaspoon dried parsley
- 1/4 teaspoon paprika
- 1/2 teaspoon salt
- 1/8 teaspoon pepper
- 1 1/2 pounds chicken tenderloins (680 g)
- 1/4 cup extra virgin olive oil (60 ml)
Instructions
- Preheat oven to 400 degrees F (200 C). Spray a baking sheet with nonstick cooking spray or place a wire rack on the baking sheet.
- In a shallow bowl mix the panko breadcrumbs, mozzarella cheese, thyme, parsley, paprika, salt, and pepper until combined.
- Pour the olive oil into another shallow bowl.
- Dredge chicken tenderloins in oil, then in breadcrumb mixture, pressing to coat both sides.
- Place coated tenders on prepared baking sheet.
- Bake for 25 minutes, flipping halfway through, until internal temperature reaches 165 degrees F (74 C).
- Sprinkle with fresh parsley and serve warm with dipping sauces.
Notes
- Pat chicken dry before dredging for better coating adherence.
- Chill coated tenders 10-15 minutes before baking for crispier results.
- Use a wire rack for maximum crispness on all sides.
- Check chicken doneness with a meat thermometer.
- Prep Time: 10 min
- Cook Time: 25 min
- Category: Main Course
- Method: Baked
- Cuisine: American
Nutrition
- Calories: 420 kcal
- Sugar: 1 g
- Sodium: 744 mg
- Fat: 21 g
- Carbohydrates: 16 g
- Fiber: 1 g
- Protein: 41 g
Ingredients and Substitutions
Base Components
Let’s break down the key ingredients that make magic happen:
- Chicken tenderloins: These natural strips cook quickly and stay juicy. Substitute boneless chicken breast cut into one-inch strips if needed
- Panko breadcrumbs: Creates an ultra-crispy coating. Regular breadcrumbs work but yield a denser texture
- Mozzarella cheese: Adds savory depth while helping bind the crust
Sauces and Seasonings
The spice blend balances simplicity and flavor:
- Garlic powder: Provides aromatic warmth without harshness
- Paprika: Imparts subtle sweetness and appetizing color
- Dried herbs: Thyme and parsley brighten up the seasoning mix beautifully
For those with dietary restrictions, consider these smart swaps:
- Gluten-free: Use certified GF panko or crushed rice cereal
- Dairy-free: Omit cheese and add 1 tablespoon nutritional yeast
- Oil alternatives: Avocado oil works perfectly as an equal substitute
How to Make Baked Chicken Tenders
Step 1: Prepare Your Equipment
Preheat your oven to 400°F (200°C). Line a rimmed baking sheet with parchment paper or aluminum foil for easier cleanup. For extra crispy results, place a wire rack on the baking sheet instead – this allows heat to circulate fully around each tender.
Step 2: Create the Crust Mix
In a shallow bowl, combine 1 1/3 cups panko, 1/4 cup mozzarella cheese, 1/2 teaspoon garlic powder, 1/4 teaspoon thyme, 1/4 teaspoon dried parsley, 1/4 teaspoon paprika, 1/2 teaspoon salt, and 1/8 teaspoon black pepper. Mix thoroughly until all ingredients distribute evenly.
Step 3: Dredge Like a Pro
Pour 1/4 cup olive oil into another shallow bowl. Pat 1 1/2 pounds chicken tenderloins dry with paper towels – this helps the coating stick better. Working one piece at a time, dip chicken in oil until fully coated, letting excess drip off. Immediately transfer to breadcrumb mixture, pressing gently to adhere crumbs on all sides.
Step 4: Bake to Perfection
Arrange coated tenders on prepared baking sheet, spacing them 1 inch apart. Bake for 12 minutes, then carefully flip each tender using tongs. Continue baking 12-13 minutes more until golden brown and internal temperature reaches 165°F (74°C) on an instant-read thermometer. Sprinkle with fresh parsley before serving if desired.
Pro Tips for Success
Follow these expert suggestions to guarantee perfect results every time:
- Chill coated tenders on the baking sheet for 10-15 minutes before baking to set the crust
- Measure panko by lightly spooning into measuring cups rather than packing it down
- Fine-tune bake time based on your oven – convection settings yield crispier results faster
- Check oven temperature accuracy periodically using an oven thermometer
Flavor Variations
Customize this versatile recipe to match your family’s taste preferences:
- Cheesy delight: Add 2 tablespoons grated mozzarella directly to the breadcrumb mixture
- Kick of heat: Mix in 1/4 teaspoon cayenne pepper with other spices
- Savory crunch: Stir 2 tablespoons crushed cornflakes into panko mixture
- Herb garden: Double the thyme and parsley for aromatic intensity
Serving Suggestions
While these tenders shine on their own, thoughtful pairings make memorable meals:
- Serve with classic honey mustard sauce or creamy ranch for dipping
- Pair with sweet potato fries and fresh veggie sticks for balanced nutrition
- Slice and toss over green salads for protein-packed lunches
- Stuff into whole wheat pitas with crisp lettuce and sliced tomatoes
These baked chicken tenders pair wonderfully with comforting vegetable dishes too. Try them alongside smoky vegetarian black-eyed peas for a hearty dinner that satisfies all appetites. Alternatively, explore pairing possibilities with this collection of black-eyed peas recipe ideas that transform simple ingredients into memorable meals.
Storage and Freezing Instructions
Proper storage keeps leftovers tasting fresh and delicious:
- Refrigerator: Store cooled tenders in airtight containers up to 4 days
- Freezer: Place fully cooled tenders in single layers between parchment in freezer bags – freeze up to 3 months
- Reheating: Warm refrigerated tenders in a 375°F oven 8-10 minutes recovers perfect crispness – frozen tenders take 15-18 minutes
Nutrition Facts per Serving
| Calories | Fat | Carbs | Protein | Fiber | Sugar | Sodium |
|---|---|---|---|---|---|---|
| 420 kcal | 21 g | 16 g | 41 g | 1 g | 1 g | 744 mg |
FAQs About Baked Chicken Tenders
Can I use chicken breasts instead of tenderloins?
Absolutely! Cut boneless, skinless breasts into one-inch thick strips against the grain. Reduce baking time slightly for thinner pieces – start checking at 20 minutes total.
Why did my breading fall off?
The most common culprit is excess moisture. Pat chicken thoroughly dry before dredging. Also ensure proper coating technique: press breadcrumbs firmly into oil-coated chicken rather than sprinkling lightly.
Can I make these ahead of time?
Yes! Prepare tenders through the breading step, arrange on baking sheet, and refrigerate uncovered up to 24 hours before baking. Alternatively, freeze unbreaded tenderloins and coat just before baking for fresher texture.
What sides complement chicken tenders best?
For classic comfort food pairings, consider creamy mashed potatoes or easy coleslaw. When seeking lighter options, serve with roasted green beans or instant pot black-eyed peas cooked without soaking. Vegetable-focused sides balance these crispy tenders beautifully while adding nutritional variety.
Final Thoughts
This baked chicken tenders recipe proves that healthier meals don’t sacrifice flavor or fun. With simple techniques and wholesome ingredients, you’ll create crispy, juicy chicken strips that even pickiest eaters devour happily. Remember, the optional chilling step before baking makes a noticeable difference in how well the crust adheres – so plan accordingly if you have extra prep time.
Whether you’re feeding finicky toddlers or hosting teenage hangouts, this versatile dish adapts to any occasion. Feel free to customize seasoning blends and dipping sauces to match family preferences. For busy nights when you need dinner fast, frozen pre-breaded tenders bake straight from the freezer – just add 3-5 minutes cooking time. Ultimately, with its balance of simplicity, nutrition, and crowd-pleasing appeal, this recipe delivers meal after satisfying meal.