In the world of homemade snacks, few treats can rival the simple pleasure of a chewy, flavorful bar. Our Peanut Butter Coconut Bars recipe is a testament to that. Combining the creamy richness of peanut butter with the sweet, tropical notes of desiccated coconut and the wholesome heartiness of oats, this recipe delivers rich flavor and satisfying texture in every bite.
It’s more than just an easy baking recipe; it’s a quick, no-fuss project that yields a batch of delicious, homemade sweet snacks perfect for any occasion. Whether you’re looking for a quick energy boost, a lunchbox filler, or a healthier dessert alternative, these bars check every box.
What makes this recipe truly special is its flexibility and speed. With a total time of just 35 minutes and minimal active prep, you can create a whole tray of bars that are naturally sweetened and full of good-for-you ingredients. The method is simple, requiring no baking in the traditional sense, just a quick chill in the fridge.
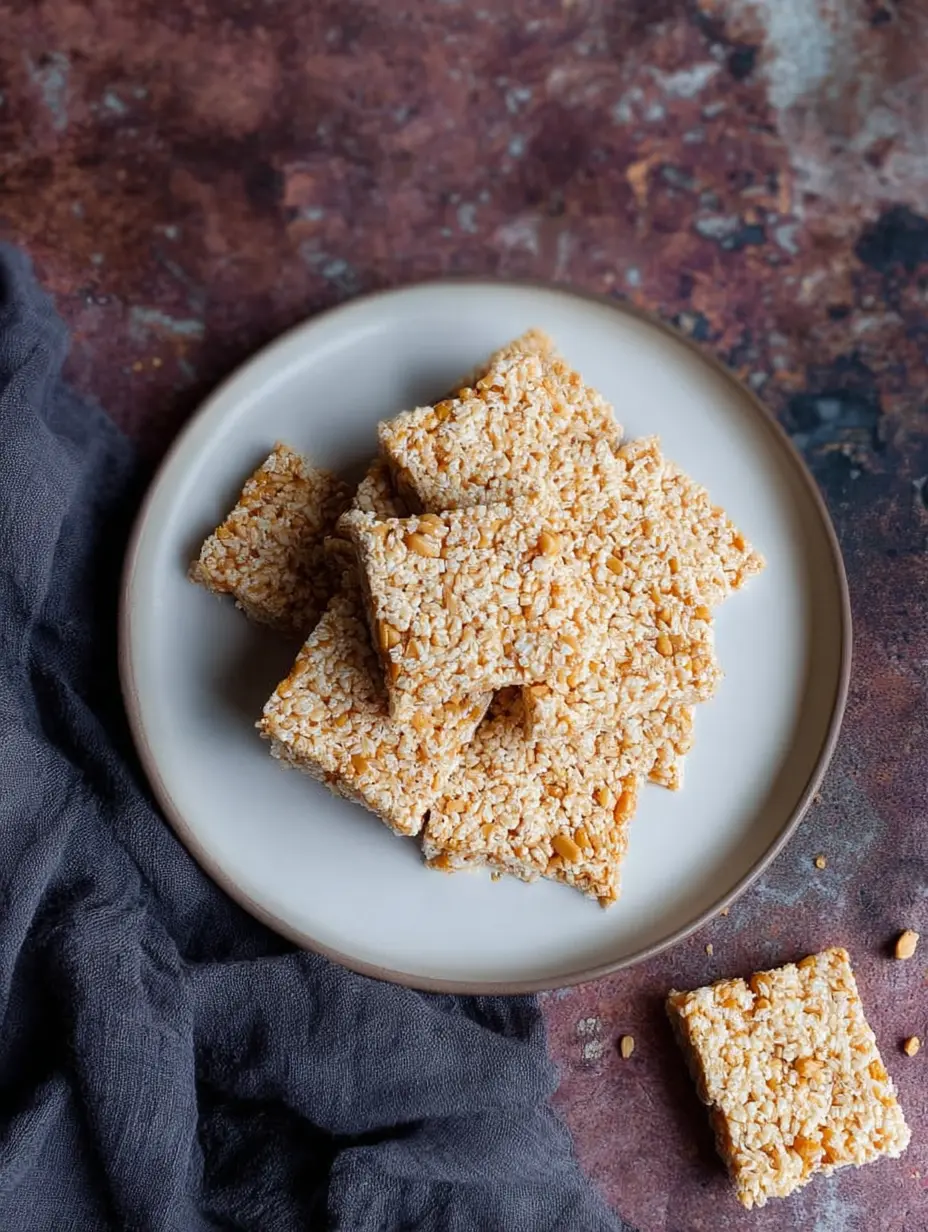
The result? A firm, sliceable bar with a delightful chewy coconut texture that holds together beautifully. Let’s dive into the details of creating these irresistible tropical dessert bars.
Why This Peanut Butter Coconut Bar Recipe Works
The magic of this recipe lies in its perfect balance of ingredients and technique. First, the combination of coconut oil and peanut butter creates a fat base that is solid when chilled, binding all the other components together. This gives the bars their structure without the need for flour or eggs.
The agave nectar acts as the primary sweetener, adding a mild, floral sweetness that complements the other flavors without overpowering them. For a deeper flavor, you could substitute with pure maple syrup or honey.
Second, the desiccated coconut and rolled oats provide the bulk and texture. The coconut delivers that signature tropical chew and flavor, while the oats add a pleasant heartiness and fiber. Together, they create a satisfying mouthfeel that is both chewy and substantial. This recipe is also incredibly forgiving.
As noted in the instructions, the mix-in stage is your chance to customize. Add a handful of dark chocolate chips for a decadent twist, some chopped nuts for extra crunch, or dried fruit like raisins or cranberries for a tangy sweetness.
A Closer Look at the Ingredients
Understanding each component helps you master the recipe and make successful substitutions.
- Coconut Oil: This is the binding agent. When melted and mixed, it coats the dry ingredients. Upon chilling, it re-solidifies, creating a firm bar. Ensure you use a good quality, unrefined coconut oil for the best coconut aroma.
- Peanut Butter: Opt for an unsalted and unsweetened variety, whether smooth or crunchy. The natural oils and proteins in the peanut butter contribute to the binding and add a deep, nutty richness that pairs perfectly with coconut.
- Agave Nectar: A liquid sweetener that blends seamlessly into the melted fat mixture. It helps keep the bars soft and chewy. Honey or pure maple syrup are excellent substitutes, each bringing its own unique flavor profile.
- Desiccated Coconut: This is finely shredded, unsweetened dried coconut. It absorbs the liquid mixture beautifully and is responsible for the bars’ primary flavor and chewy coconut texture.
- Oats: Use old-fashioned rolled oats for the best texture. They provide body, fiber, and a slightly nutty flavor that grounds the sweetness.
Step-by-Step Instructions for Perfect Bars
Follow these simple steps for a foolproof result every time. You’ll need a microwave-safe bowl, a spoon for stirring, and a square dish (like an 8×8 inch pan) lined with parchment paper or reusable baking liners.
Step 1: Melting the Base Ingredients
Place the measured coconut oil, peanut butter, and agave nectar in your large bowl. Heat in the microwave for about 40 seconds, or until the coconut oil is fully melted. The goal is to warm the mixture enough to combine it into a smooth, homogeneous liquid. Using a microwave is quick, but you can also do this in a small saucepan over very low heat on the stovetop.
Once heated, stir vigorously until the three ingredients are fully emulsified into a single, creamy mixture. This forms the flavorful glue for your bars.
Step 2: Mixing and Pressing
Add the desiccated coconut and oats to the warm liquid mixture. Stir very well, ensuring every bit of the dry ingredients is thoroughly coated. This is the stage where you can fold in any extras like chopped almonds, pumpkin seeds, or mini dark chocolate chips. Transfer the mixture to your prepared square dish.
Use the back of a spoon or a small piece of parchment paper to press the mixture down firmly and evenly. A solid, compact press is crucial; it prevents the bars from being crumbly when cut later. The more you press, the better they will hold together.
Step 3: Chilling and Slicing
Place the dish, uncovered, in the refrigerator. Allow it to chill for at least 30 minutes, or until completely firm to the touch. This chilling time allows the coconut oil and peanut butter to set. Once set, remove the dish from the fridge. Using a sharp knife, cut the slab into your desired bar sizes—rectangles or squares.
To remove them, gently lift the entire slab out using the parchment paper overhang. If the first corner is tricky, carefully use a knife to loosen it. The bars should release cleanly. Store them in an airtight container in the refrigerator to maintain their perfect texture.
Nutrition Facts & Storage Tips
These Peanut Butter Coconut Bars are a satisfying snack with a nutritional profile that supports your energy levels. Below is a detailed breakdown per serving.
| Nutrient | Amount per Bar |
|---|---|
| Calories | 86 kcal |
| Total Fat | 7 g |
| Carbohydrates | 5 g |
| Fiber | 1 g |
| Sugars | 2 g |
| Protein | 1 g |
| Sodium | 14 mg |
Storage: Due to the coconut oil content, these bars are best kept refrigerated. They will stay fresh and firm for up to two weeks. For longer storage, you can individually wrap them and freeze them for up to three months.
Simply thaw in the refrigerator before enjoying. The bars may soften slightly at room temperature, so for the best chewy coconut texture, eat them cool.
Customizations and Recipe Variations
The base recipe is a fantastic canvas for creativity. Here are some popular variations to try:
- Chocolate Drizzle: Melt some dark chocolate and drizzle it over the top of the pressed mixture before chilling for an elegant finish.
- Protein Boost: Add a scoop of vanilla or chocolate protein powder to the dry ingredients. You may need to add a tiny splash of extra liquid sweetener to compensate for the dryness.
- Nut-Free Version: Replace the peanut butter with sunflower seed butter for a similarly rich and nutty flavor that’s safe for allergies.
- Super Seed Bars: Add two tablespoons each of chia seeds and flaxseed meal along with the oats for an extra fiber and omega-3 boost.
If you love the combination of peanut butter and coconut, you might also enjoy our other peanut butter-centric recipes. For a more traditional baked bar, try our classic Lunch Lady Peanut Butter Bars. If you’re looking for a fun, bite-sized frozen treat, our Peanut Butter Yogurt Bites are a perfect choice. And for the ultimate chocolate indulgence, our Gooey Chocolate Brownie Cake is a crowd-pleaser.
Conclusion: Your New Go-To Snack Recipe
Creating these Peanut Butter Coconut Bars is an exercise in simple, wholesome cooking. This easy baking recipe requires no special skills or equipment, yet it produces a batch of homemade sweet snacks that are both delicious and relatively nutritious. The tropical dessert bar vibe makes them feel like a special treat, while the ingredients keep them grounded as a practical snack.
They are perfect for meal prep, after-school treats, hiking fuel, or a quick dessert. We encourage you to make this recipe your own. Experiment with different add-ins and find your favorite combination. Once you experience how easy it is to make chewy, satisfying bars right in your own kitchen, you’ll find yourself coming back to this recipe again and again. Happy cooking!
Recipe
Print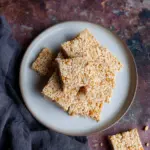
Peanut Butter Coconut Bars
- Total Time: 35 min
- Yield: 18 servings 1x
Description
Chewy, no-bake bars combining creamy peanut butter, tropical coconut, and hearty oats for a quick and satisfying homemade snack.
Ingredients
40 g coconut oil
45 g peanut butter (unsalted and unsweetened, smooth or crunchy)
30 g agave nectar (Honey or maple syrup can be used as a substitute)
100 g dessicated coconut
50 g oats
Instructions
- Put the coconut oil, peanut butter and agave nectar in a large microwave-proof bowl. Heat for about 40 seconds and then stir them together until they are fully combined.
- Add the coconut and oats and stir well. At this stage you could add extra nuts, seeds, dried fruit or chocolate chips if you wanted.
- Line a square dish with cling film or baking paper and press the mixture down well using the back of a spoon.
- Put in the fridge to harden up.
- Take the dish out of the fridge and cut into bars and gently ease out of the dish. I found the first couple crumbled up but after that the rest came out fine.
- Store the bars in the fridge.
Notes
- For best results, press the mixture very firmly into the dish to prevent crumbling.
- Bars must be stored in the refrigerator to maintain texture.
- Agave nectar can be substituted with pure maple syrup or honey.
- Prep Time: 5 min
- Category: Main Course
- Method: Baked
- Cuisine: American
Nutrition
- Calories: 86 kcal
- Sugar: 2 g
- Sodium: 14 mg
- Fat: 7 g
- Carbohydrates: 5 g
- Fiber: 1 g
- Protein: 1 g